Adding MCP Servers
Overview
Managing MCP servers in the Obot gateway starts with adding them to the main catalog. Administrators can control which servers are available to users and how they are configured. Servers may be added individually through the UI, or managed via a Git repository.
The choice of server type depends on how the MCP server was developed. All servers that are not remote servers are deployed and managed by the Obot Gateway.
Server types
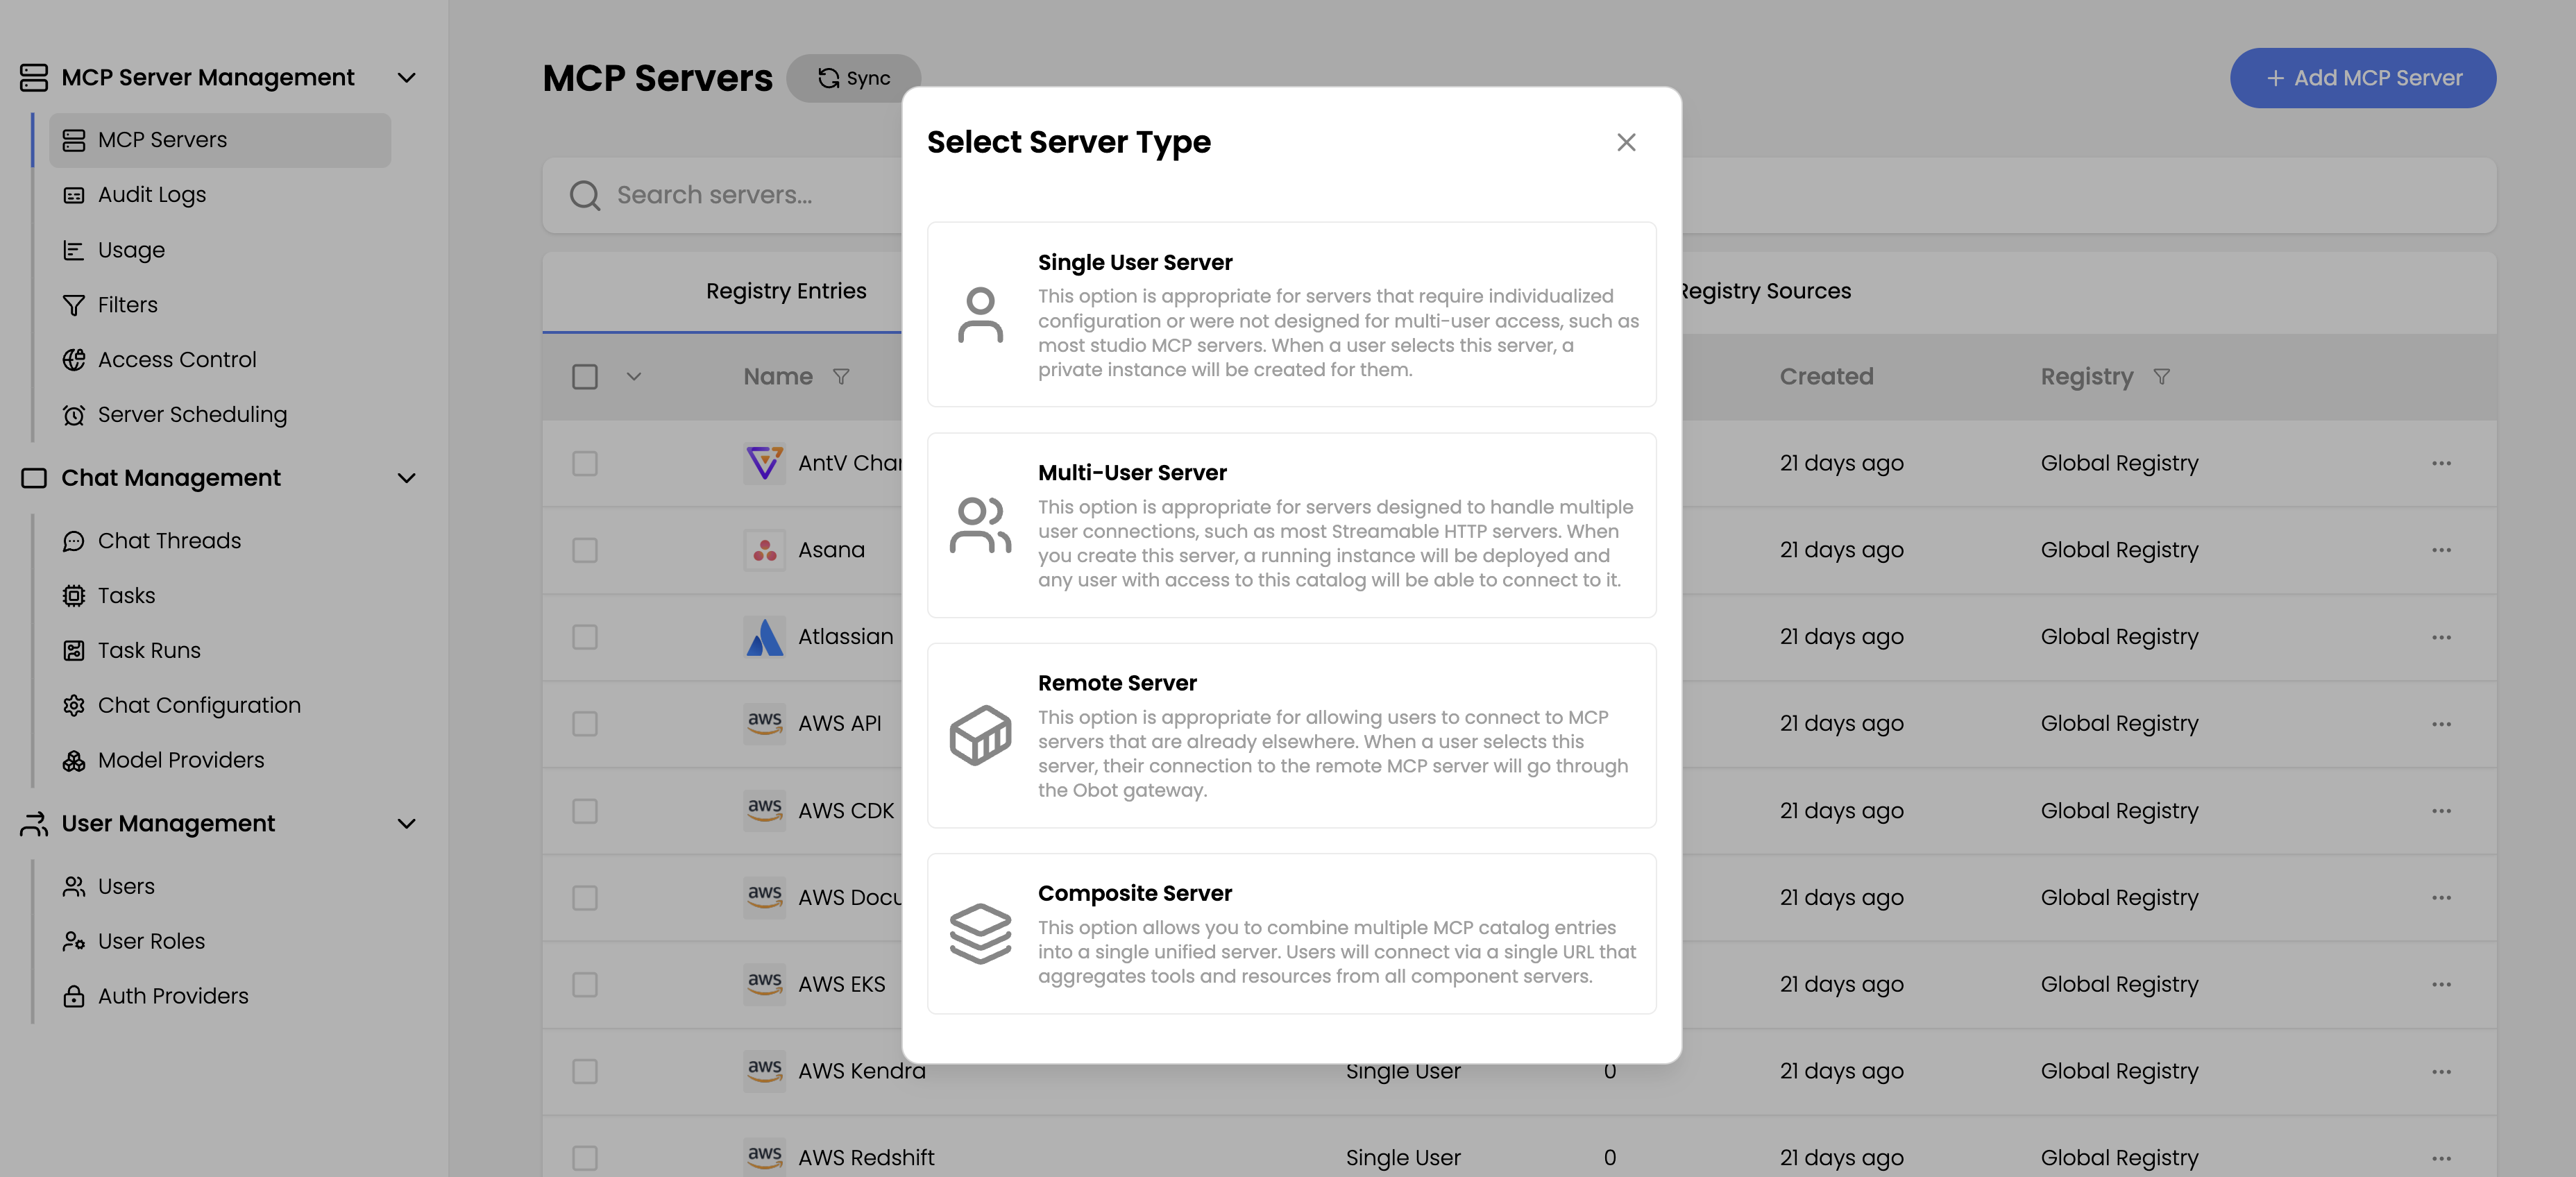
The system supports four distinct server types, each designed for specific deployment scenarios:
Single-user server
Single-user servers establish a one-to-one mapping between users and server instances. Each user has their own server instance deployed and provides their own individual credentials (such as personal API keys). Most stdio servers were designed with this model in mind. The intended use was to run on the individuals laptop.
This model provides maximum isolation and is ideal when:
- Users need to connect with their personal accounts (e.g., individual GitHub tokens)
- Security policies require user-level credential isolation
- Different users need different configurations or permissions
Keep in mind the gateway will deploy these servers in their own environment on a hosted platform. MCP servers that expect local access to the users filesystem, run local executables, or write output to the local disk will not work as expected.
Multi-user server
Multi-user servers address organizational deployment patterns through two primary configurations:
- Shared credentials: Organizations provide centralized credentials (e.g., a weather API key) that all users can leverage
- Self-authenticating servers: Servers that handle OAuth or multi-tenancy internally, enabling secure multi-user access
This approach is optimal when:
- The organization owns shared service accounts or API keys
- You want to simplify user onboarding by eliminating individual setup
- The service supports organizational or tenant-based access
- Usage monitoring and control at the organizational level is important
Multi-User servers will still require the user to authenticate to the Obot Gateway's configured identity provider.
Remote server
MCP Servers that are HTTP Streaming compatible should be configured this way. These servers can be provided by trusted 3rd party vendors. Remote servers also work for MCP servers deployed through existing CI/CD pipeline within the organization.
Choose this type when:
- You have MCP services deployed through traditional application deployment mechanisms
- External partners provide MCP endpoints and you just want to integrate
- You are building MCP servers through existing CI/CD workflows or SaaS services
Remote MCP servers that conform to the MCP spec authentication schema will work out of the box. Servers that do not conform to the spec may not work within the Gateway. Please open a GitHub issue if you run into issues with remote servers.
Composite server
Composite servers let administrators combine one or more Single-user, Multi-user, and Remote servers into a single virtual MCP server. It also allows admins to control the names, descriptions, and availability of the tool set exposed to end-users.
This type is useful when:
- You want a single connection endpoint that aggregates tools from multiple servers
- You need fine-grained tool RBAC without exposing entire servers
- You want to fine-tune exposed tool names and descriptions
- You want to create tool sets tailored to specific user groups and use cases
Adding a server
Navigate to the Admin panel and access the MCP Servers section, then select Add MCP Server button.
Select the type of server you want to deploy.
Basic configuration
All server types require the same basic identifying information:
- Name and description: Provide a clear name and description to help users understand the server's purpose
- Icon URL: Optionally specify an icon URL to improve visual identification in the user interface
- Categories/tags: Add optional categorization to facilitate server discovery and filtering
Runtime selection
Single-user and multi-user servers require runtime environment configuration. Remote servers skip this section since they connect to existing deployments.
Select the appropriate runtime environment based on your server's requirements:
NPX: Node/Typescript Based MCP Servers
If you found an MCP server like Firecrawl and want to add it to your Obot Gateway you would do the following.
From the README.md:
{
  "mcpServers": {
    "firecrawl-mcp": {
      "command": "npx",
      "args": ["-y", "firecrawl-mcp"],
      "env": {
        "FIRECRAWL_API_KEY": "YOUR-API-KEY"
      }
    }
  }
}
In Obot Gateway
- You would select NPX from the drop down.
- Then put
firecrawl-mcpin the package text box.
For single-user setup, you would add User supplied configuration
- Name: Firecrawl API Key
- Description: The api key for Firecrawl
- Key: FIRECRAWL_API_KEY
In this case you would select required and sensitive options as well.
For multi-user setup, you would follow the same steps but would be configuring this to SHARE a common API key with ALL users.
UVX: For Python-based packages
If you found an MCP server like Duckduckgo and want it added to the Obot Gateway you would do the following.
From the README.md:
{
    "mcpServers": {
        "ddg-search": {
            "command": "uvx",
            "args": ["duckduckgo-mcp-server"]
        }
    }
}
In the Gateway you would:
- Select UVX from the drop down
- In the package field put in
duckduckgo-mcp-server
If environment variables need to be configured, you would use the user or multi-user configuration to supply or prompt for the values.
Containerized: For Docker-based deployments
If you want to provide a container to run your MCP server because you are running a non-TypeScript or Python MCP server you must configure it to run as either Streaming HTTP or SSE.
You will need to select the container option from the drop down. Then provide the following bits of info:
- Image: The uri of the OCI image. (ex. docker.elastic.co/mcp/elasticsearch)
- Port: port the MCP server will be listening on inside the container.
- Path: the URI path. (typically /MCP or /SSE)
- Command: primary command to execute
- Arguments: arguments to pass to the command.
You can also provide configuration through environment variables by filling in the configurations.
Configuration parameters
How configuration is handled depends on the server type:
Single-user servers
Define the configuration parameters that users must provide when enabling the server. Common examples include API keys and authentication tokens.
For each parameter, specify:
- Label and description: Clear identification of the parameter's purpose
- Environment variable name: The variable name expected by the server (e.g.,
OPENAI_API_KEY) - Required: Whether the parameter is mandatory for server operation
- Sensitive: Whether the value should be masked in the user interface
User-provided values are passed as environment variables to the server process during initialization.
Multi-user servers
Multi-user servers use pre-configured values that are deployed with the server instance. Configure any required API keys or environment variables in this section. These values will be set on the deployment automatically.
Unlike single-user servers, there are no user environment settings with multi-user servers since everything is handled in the configuration section. The server will be pre-deployed, and users simply connect to it without being prompted for any information.
When users authenticate, they use the built-in authentication or OAuth per the MCP specification.
Remote servers
Configure the connection to your remote MCP server:
- Remote URL: The endpoint URL for the remote MCP server
Additional configuration options are available for specialized scenarios:
- Connection restrictions: Restrict connections to specific URLs if the provider requires unconventional configurations
- Custom headers: Set specific HTTP headers if required by the remote server
- Configuration values: Set configuration values that will be sent to the remote server
For most remote server configurations, you'll typically only need to specify the remote URL.
Select Save to deploy the persist the server configuration.
Composite servers
Configuration parameters for composite servers are inherited from the set of MCP servers they contain.
When connecting to a composite MCP server, end-users will be prompted to provide arguments for each "component" MCP server in the composite.
Each component can also be individually disabled by the end user during configuration, in which case, they will not need to provide configuration
for the component, and its tools and prompts will not be made available in their launched instance. Disabled components can be re-enabled by end-users
via the Edit Config dialog for their connected MCP server.
If the composite server contains remote component servers that require OAuth, the user will be prompted to authenticate or skip authentication for each tool that requires OAuth. If OAuth is skipped for a component, the component MCP server is automatically disabled for the composite instance.
Post-deployment management
After successfully adding a server:
- The server appears in the available servers list for authorized users
- Server entries can now be added to authorization groups for different teams
- Users can integrate the server into their clients to access tools in conversations and tasks
- Administrative monitoring of usage and auditing is available through the Admin panel