Auth Providers
Authentication providers allow your Obot installation to authenticate users with the identity provider of your choice. Administrators must configure at least one authentication provider before users can log in. Multiple providers can be configured and available for login at the same time.
In order for authentication to be enabled, the Obot server must be run with the environment variable set:
OBOT_SERVER_ENABLE_AUTHENTICATION=true.
Setting up Authentication
Bootstrap Token
When launching Obot for the first time, the server will print a randomly generated bootstrap token to the console.
When installing via Helm, this token is saved inside a kubernetes secret <helm install name>-config.
This token can be used to authenticate as an admin user in the UI. You will then be able to configure authentication providers. Bootstrap login remains available until at least one authentication provider is configured and at least one non-bootstrap owner user exists. Once both are true, the bootstrap token will no longer be valid.
You can use the OBOT_BOOTSTRAP_TOKEN environment variable to provide a specific value for the token,
rather than having one generated for you. If you do this, the value will not be printed to the console.
Obot will persist the value of the bootstrap token on its first launch (whether randomly generated or
supplied by OBOT_BOOTSTRAP_TOKEN), and all future server launches will use that same value.
OBOT_BOOTSTRAP_TOKEN can always be used to override the stored value.
Preconfiguring Owner & Admin Users
If you want to preconfigure owner or admin users, you can set the OBOT_SERVER_AUTH_OWNER_EMAILS or OBOT_SERVER_AUTH_ADMIN_EMAILS environment variable, respectively.
This is a comma-separated list of email addresses that will be granted owner or admin access when they log in,
regardless of which auth provider they used. Email matching is case-insensitive.
Users can be given the administrator role by other owners or admins in the Users section of the UI. Users whose email addresses are in configured list will automatically have the administrator role, and the role cannot be revoked from them.
Similarly, users can be given the owner role by other owners in the Users section of the UI. Users whose email addresses are in configured list will automatically have the owner role, and the role cannot be revoked from them.
Access Control
Restricting Access by Email Domain
All authentication providers support restricting access to specific email domains, using the "Email Domains" field in the configuration UI.
You can:
- Use
*to allow all email domains - Specify a comma-separated list of domains to restrict access
Example: example.com,example.org would only allow users with email addresses ending in example.com or example.org.
Available Auth Providers
Obot currently supports the following authentication providers (using OAuth2). Before getting started you will need to follow the instructions in the auth provider for setting up a new app. You can get the callback URL from the Obot Admin -> Auth Providers -> <Auth Provider> -> Configure page. The configuration form will also have fields for the data required.
GitHub
You will need to create an OAuth App in GitHub following these instructions.
You can view the source code for GitHub provider in this repo.
Google
Follow the instructions here to create the OAuth app for Obot.
You can view the source code for Google provider in this repo.
Entra (Enterprise Only)
Within the Microsoft Entra admin center, go to App registrations and click New registration.
Under Supported account types, ensure Accounts in this organizational directory only is selected. In the Redirect URI section, set the platform to Web and enter the redirect URI provided in Obot's Auth Provider configuration dialog.
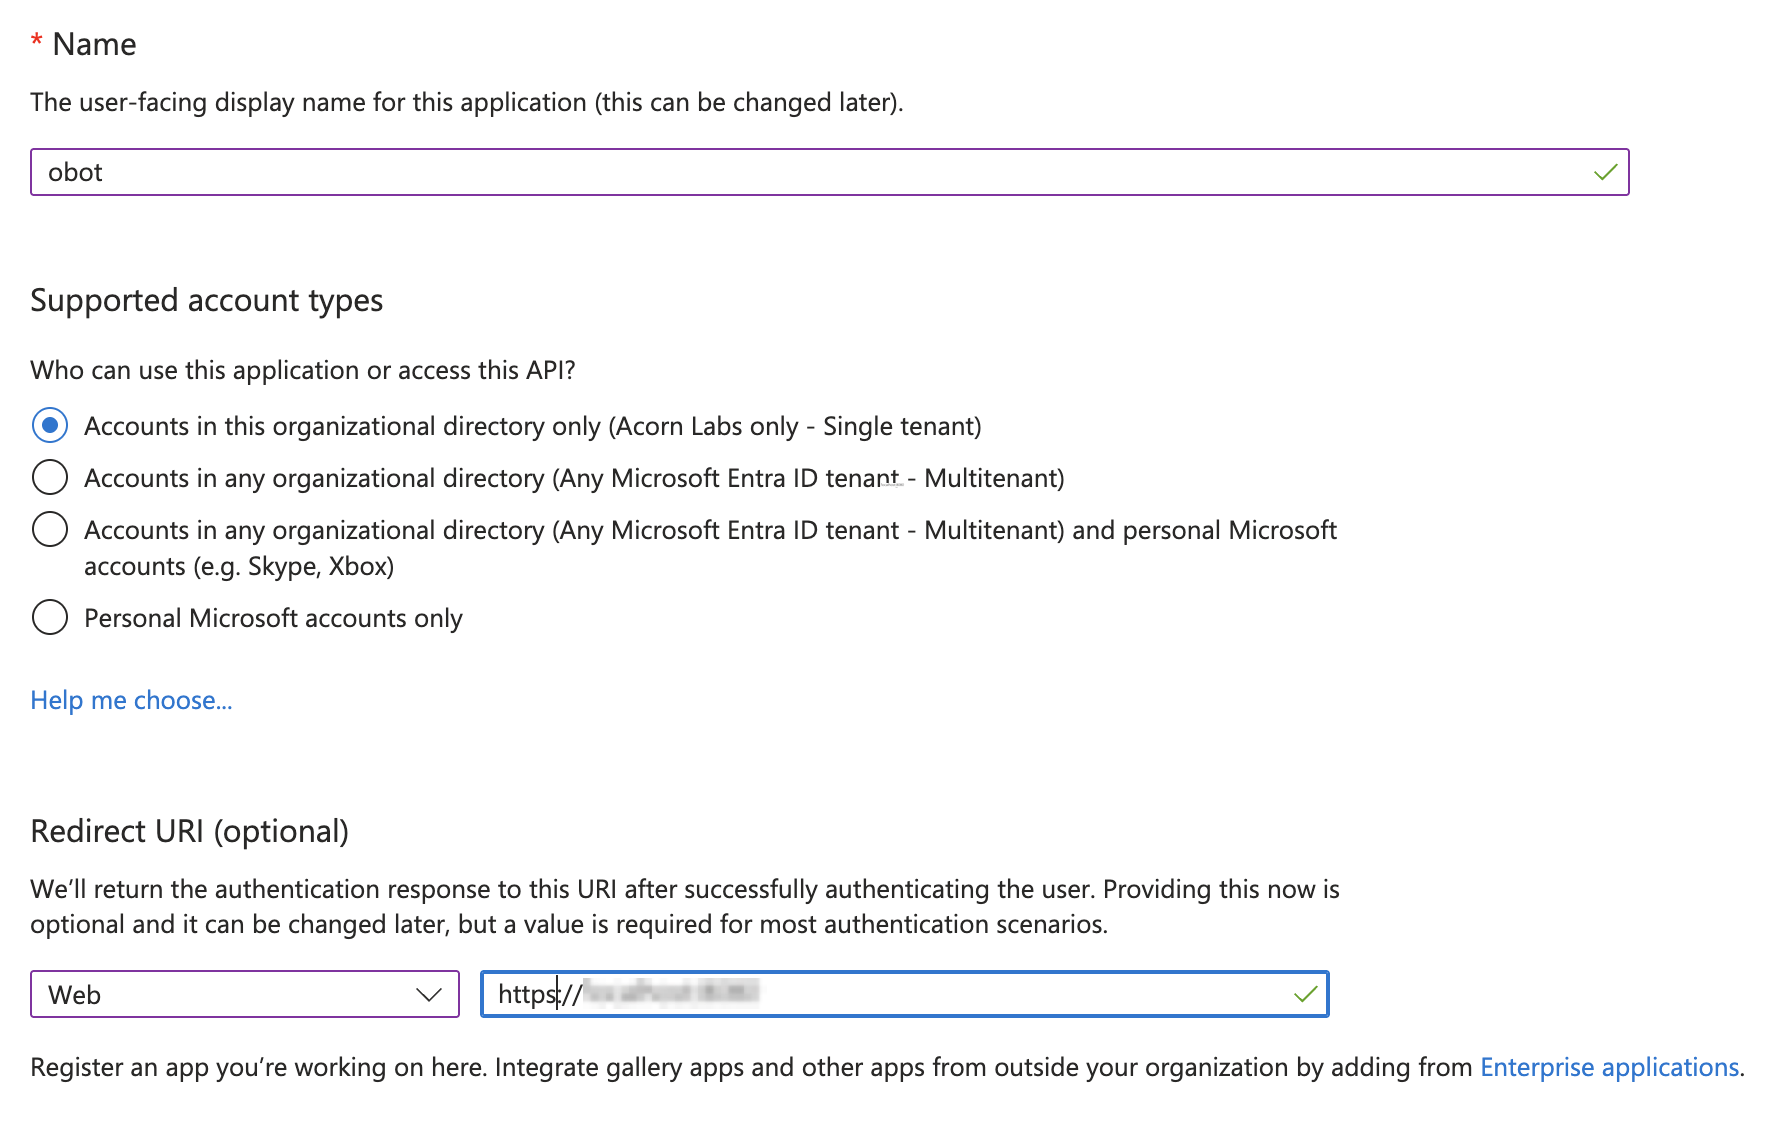
After completing the form, click Register.
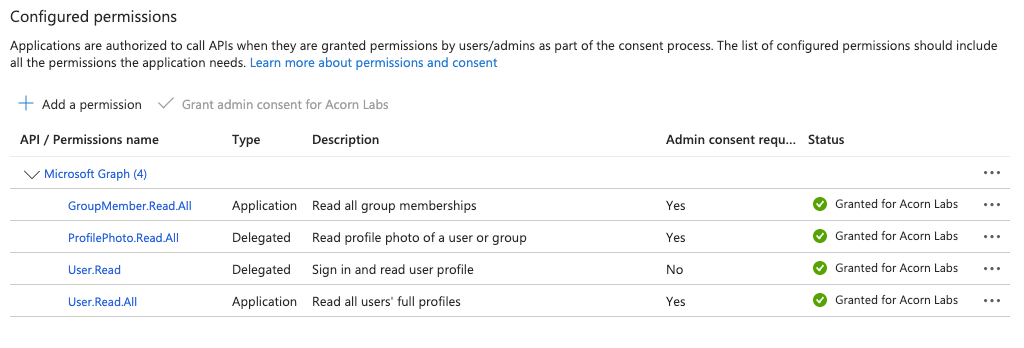
Next, go to the API permissions tab and add the following delegated permissions:
User.ReadProfilePhoto.Read.Allrequires admin approval
Then add the following application permissions:
GroupMember.Read.Allrequires admin approvalUser.Read.Allrequires admin approval
After all permissions are approved, your App's Configured permissions section should look something like this:
Head to the Certificates & secrets tab and click New Client secret.
Select a desired expiration date and click Add.
Copy the exposed secret from the Value column to a safe location. You will not be able to retrieve the secret value after this point.

Finally, navigate to the Overview tab and copy the values of Application (client) ID and Directory (tenant) ID for reference.
You can now return to Obot and finish configuring Entra. Use the table below to determine the values to use for each field:
| Obot | Entra | Entra App Tab |
|---|---|---|
| Client ID | Application (client) ID | Overview |
| Client Secret | Secret Value column | Certificates & secrets |
| Tenant ID | Directory (tenant) ID | Overview |
Restricting Login to Specific Users and Groups (Optional)
You can restrict login access to specific Entra users and groups by taking the following steps:
- Navigate to the Microsoft Entra admin center
- Select
Enterprise apps, then selectAll applications - Select the application corresponding to your Obot instance
- On the application's
Overviewpage, under theManagesection, selectProperties - Toggle the
Assignment required?setting toYes - Select
Savein the top bar - Under
Manage, selectUsers and Groupsand then selectAdd user/group - Search for and add the desired Entra users and groups to the application
For more details, see Entra's docs.
Okta (Enterprise Only)
Only the org-level authorization server is supported (no custom authorization servers).
Create an OAuth app of type OIDC in Okta following these instructions.
Make sure to add the redirect URL displayed in Obot to the list of Sign-in redirect URIs in your Okta application settings.
Take note of the Client ID and Client Secret. You will need to provide these to Obot.
Next, create another OAuth app, this time of type API Services. Grant it the API scopes okta.users.read and okta.groups.read.
Assign an administrator role to this app that has, at a minimum, okta.users.read and okta.groups.read permissions.
You can use an existing administrator role (such as Read-Only Administrator), or create a custom one.
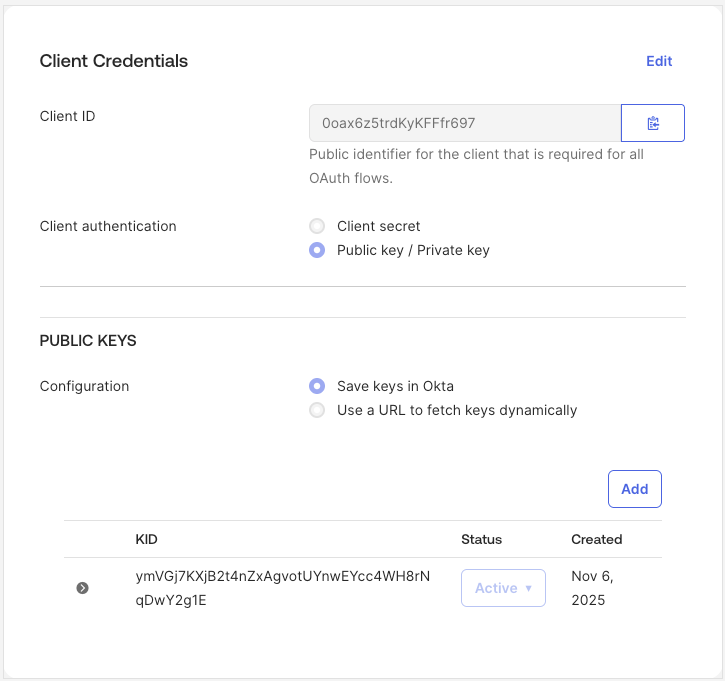
Next, change the client authentication method on your API Services app from Client secret to Public key / Private key.
Then, add a new key to your app. Ensure that your app has only one key in total. You can generate the key on your own,
or have Okta do it for you. Make sure you save the private key in PEM format, as you will need to provide that to Obot,
in addition to the Client ID for this app. When you are done with that, the Client Credentials section should look similar to this:
Restricting Login to Specific Users and Groups (Optional)
You can restrict login access to specific Okta users and groups by taking the following steps:
- While creating the
OIDCApp for Obot, select theSkip group assignment for nowoption in theAssignmentsconfiguration section - After the App is created, go to the App's configuration page
- In the
Assignmentstab, click on theAssignbutton and selectAssign to Groupsin the dropdown menu - Select
Assignon groups you want to allow Obot access to - Once you've made your selections, click
Done
JumpCloud (Enterprise Only)
Create a Custom OIDC App in the JumpCloud Admin Portal. When configuring the app:
- Set the Redirect URI / Callback URL to the redirect URI displayed in Obot's Auth Provider configuration dialog
- Ensure the application can issue the scopes
openid,email,profile, andoffline_access - Take note of the app's Client ID and Client Secret
- Configure the app to include group membership claims:
- Enable Include Group Attribute and set the exact attribute name to
memberOf. This is required for group-based authorization in Obot. - Set group assignment to User groups assigned to this app
- Enable Include Group Attribute and set the exact attribute name to
- Assign the JumpCloud user groups that should be allowed to sign in to this application. Users who are not assigned to the app through a group assignment will not be able to log in.
You will also need JumpCloud management API credentials for JumpCloud management API access. These credentials are separate from the OIDC app credentials used for login.
Obot uses the JumpCloud management API to:
- look up the authenticated JumpCloud system user
- verify the user is active and not suspended
- list JumpCloud user groups for admin selection
- map OIDC
memberOfclaim values to known JumpCloud groups
You must provide one of the following in the Obot Auth Provider configuration:
- a JumpCloud service account client ID and client secret. This is the preferred option for JumpCloud group lookup and assignment in Obot.
- or an API key with access to read users and user groups
If you use a service account:
- Create a JumpCloud API service account for Obot in the JumpCloud admin console
- Generate or reveal its Client ID and Client Secret
- Read-only permissions are sufficient
If you use service-account credentials and your JumpCloud region requires a different admin OAuth endpoint, override the token URL in Obot as well.
You can now return to Obot and finish configuring JumpCloud. Use the table below to determine the values to use for each field:
| Obot | JumpCloud |
|---|---|
| Client ID | OIDC app Client ID |
| Client Secret | OIDC app Client Secret |
| Service Account Client ID | JumpCloud service account client ID. Preferred instead of API Key. |
| Service Account Client Secret | JumpCloud service account client secret. Preferred instead of API Key. |
| API Key | Admin Portal API key. Required if Service Account Client ID and Service Account Client Secret are not configured. |
| Service Account Token URL (Optional) | Optional admin OAuth token endpoint. Defaults to https://admin-oauth.id.jumpcloud.com/oauth2/token. |
| Issuer URL (Optional) | Optional OIDC issuer URL. Defaults to https://oauth.id.jumpcloud.com/. |
| API Base URL (Optional) | Optional JumpCloud API base URL. Defaults to https://console.jumpcloud.com; use https://console.eu.jumpcloud.com for EU tenants. |
The JumpCloud user must resolve to an active, non-suspended JumpCloud system user. Suspended or inactive users will be blocked from logging in.
Auth0 (Enterprise Only)
Create a Regular Web Application in the Auth0 Dashboard by navigating to Applications > Applications > Create Application.
In the application's Settings tab:
- Set the Allowed Callback URLs to the redirect URI displayed in Obot's Auth Provider configuration dialog
- Take note of the Domain, Client ID, and Client Secret
Auth0 users must have a verified email address to log in to Obot. If a user's email is not verified, the login will fail with a 500 error.
You can verify a user's email in the Auth0 Dashboard under User Management > Users by selecting the user and confirming their email is marked as verified. Alternatively, ensure your Auth0 connection is configured to automatically verify emails.
If your Auth0 tenant does not support email verification (e.g. certain social or enterprise connections), you can set the OBOT_AUTH0_AUTH_PROVIDER_INSECURE_ALLOW_UNVERIFIED_EMAIL configuration option to true in the Auth Provider configuration dialog. Note that this weakens account and email-domain validation.
You can now return to Obot and finish configuring Auth0. Use the table below to determine the values to use for each field:
| Obot | Auth0 | Auth0 Dashboard Location |
|---|---|---|
| Auth0 Domain | Domain | Application Settings |
| Client ID | Client ID | Application Settings |
| Client Secret | Client Secret | Application Settings |
Machine to Machine Application
A Machine to Machine application is required for Obot to read user and role information from Auth0.
Create one in the Auth0 Dashboard by navigating to Applications > Applications > Create Application and selecting Machine to Machine.
- Authorize the app for the Auth0 Management API with the following scopes:
read:usersread:rolesread:role_members
- Take note of the Client ID and Client Secret for this application
Use the table below to determine the values to use for each field in Obot's Auth Provider configuration dialog:
| Obot | Auth0 | Auth0 Dashboard Location |
|---|---|---|
| Machine to Machine Client ID | Client ID | Application Settings |
| Machine to Machine Client Secret | Client Secret | Application Settings |
Restricting Login to Specific Users (Optional)
You can restrict which users can log in to Obot through Auth0 using connection-level access control or organizations.
Using Connection-Level Access Control
You can limit which Auth0 connections (identity providers) are allowed to log in to Obot.
- In the Auth0 Dashboard, navigate to Applications > Applications
- Select your Obot application
- Open the Connections tab
- Disable any connections that should not be allowed to log in to Obot
- Leave enabled only the connections for users who should have access
Using Auth0 Organizations
If your Auth0 tenant supports Organizations, you can restrict access to users who belong to specific organizations.
- In the Auth0 Dashboard, navigate to Organizations
- Create a new organization
- Add the desired users as members
- Under the organization's Connections tab, enable the connections users should use to log in
- In Applications > Applications, select your Obot application
- Open the Organizations tab and configure the application to require organization membership
Switching Between Auth Providers
This section describes the steps involved in switching authentication providers in Obot. In this example, the provider is switched from GitHub to Microsoft Entra.
Prerequisites
- Authentication is already enabled.
- GitHub is configured as the active authentication provider.
- An initial Owner user is already set up.
Step 1: Verify Bootstrap Login is Enabled
Ensure the following environment variable is set in your Obot installation:
OBOT_SERVER_FORCE_ENABLE_BOOTSTRAP=true
Step 2: Deconfigure the Existing Auth Provider (GitHub)
- Log in to the admin console (
<obot-server>/admin). - Use the Sign in with Bootstrap Token option.
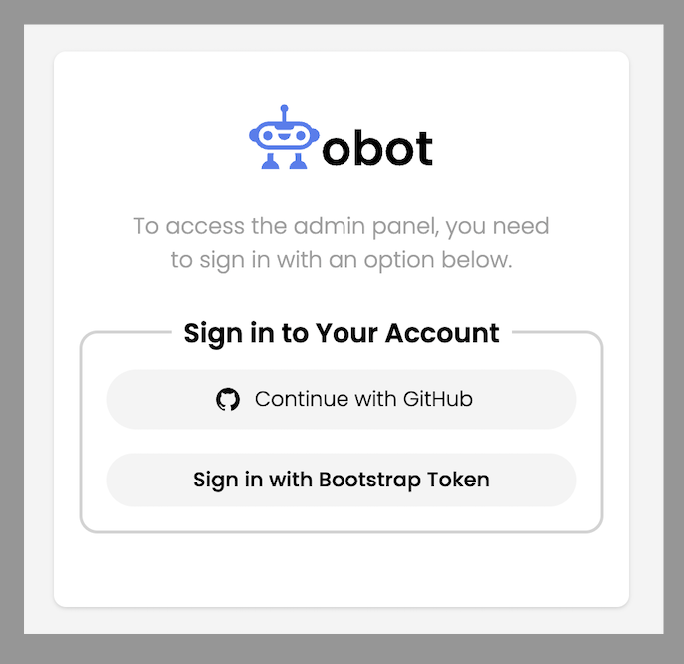
- Enter the Bootstrap Token and click Login.
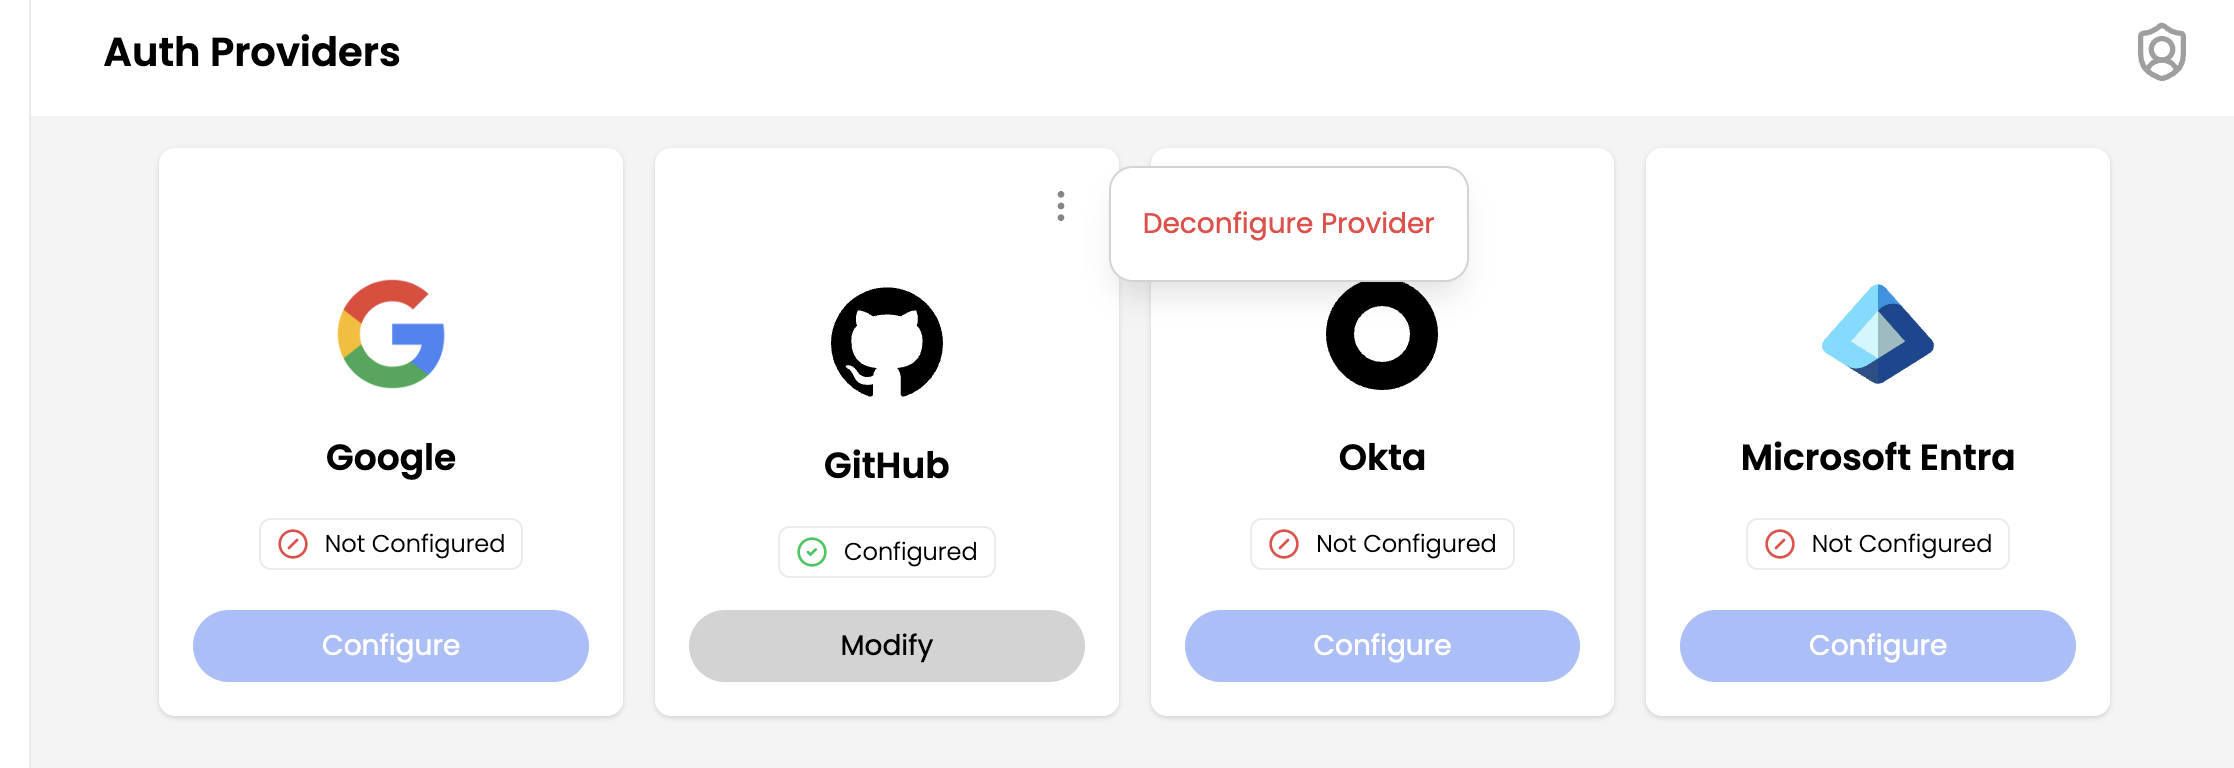
- Navigate to User Management → Auth Providers.
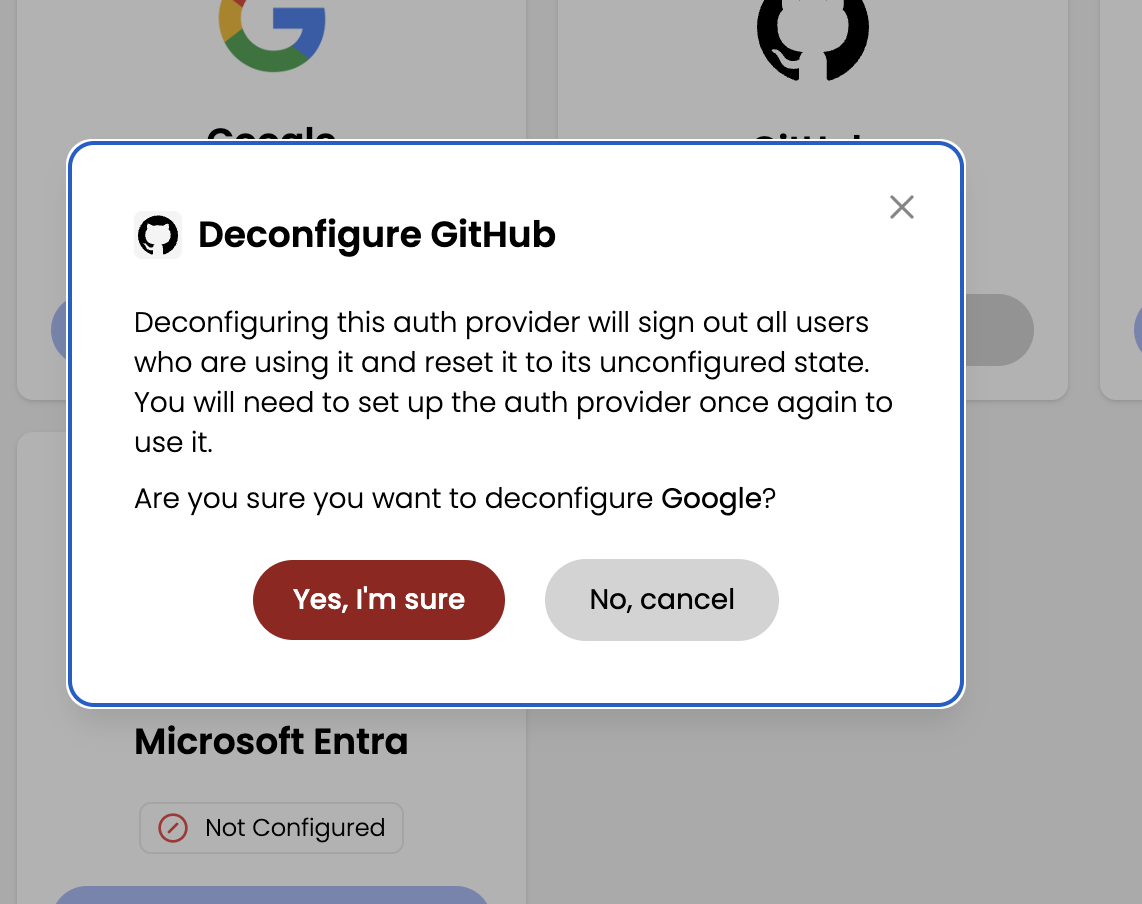
- In the configured provider (GitHub in this case), click Deconfigure Provider.
- When prompted for confirmation, click Yes, I'm sure.
- After deconfiguration, you are redirected to the Welcome to Obot! page.
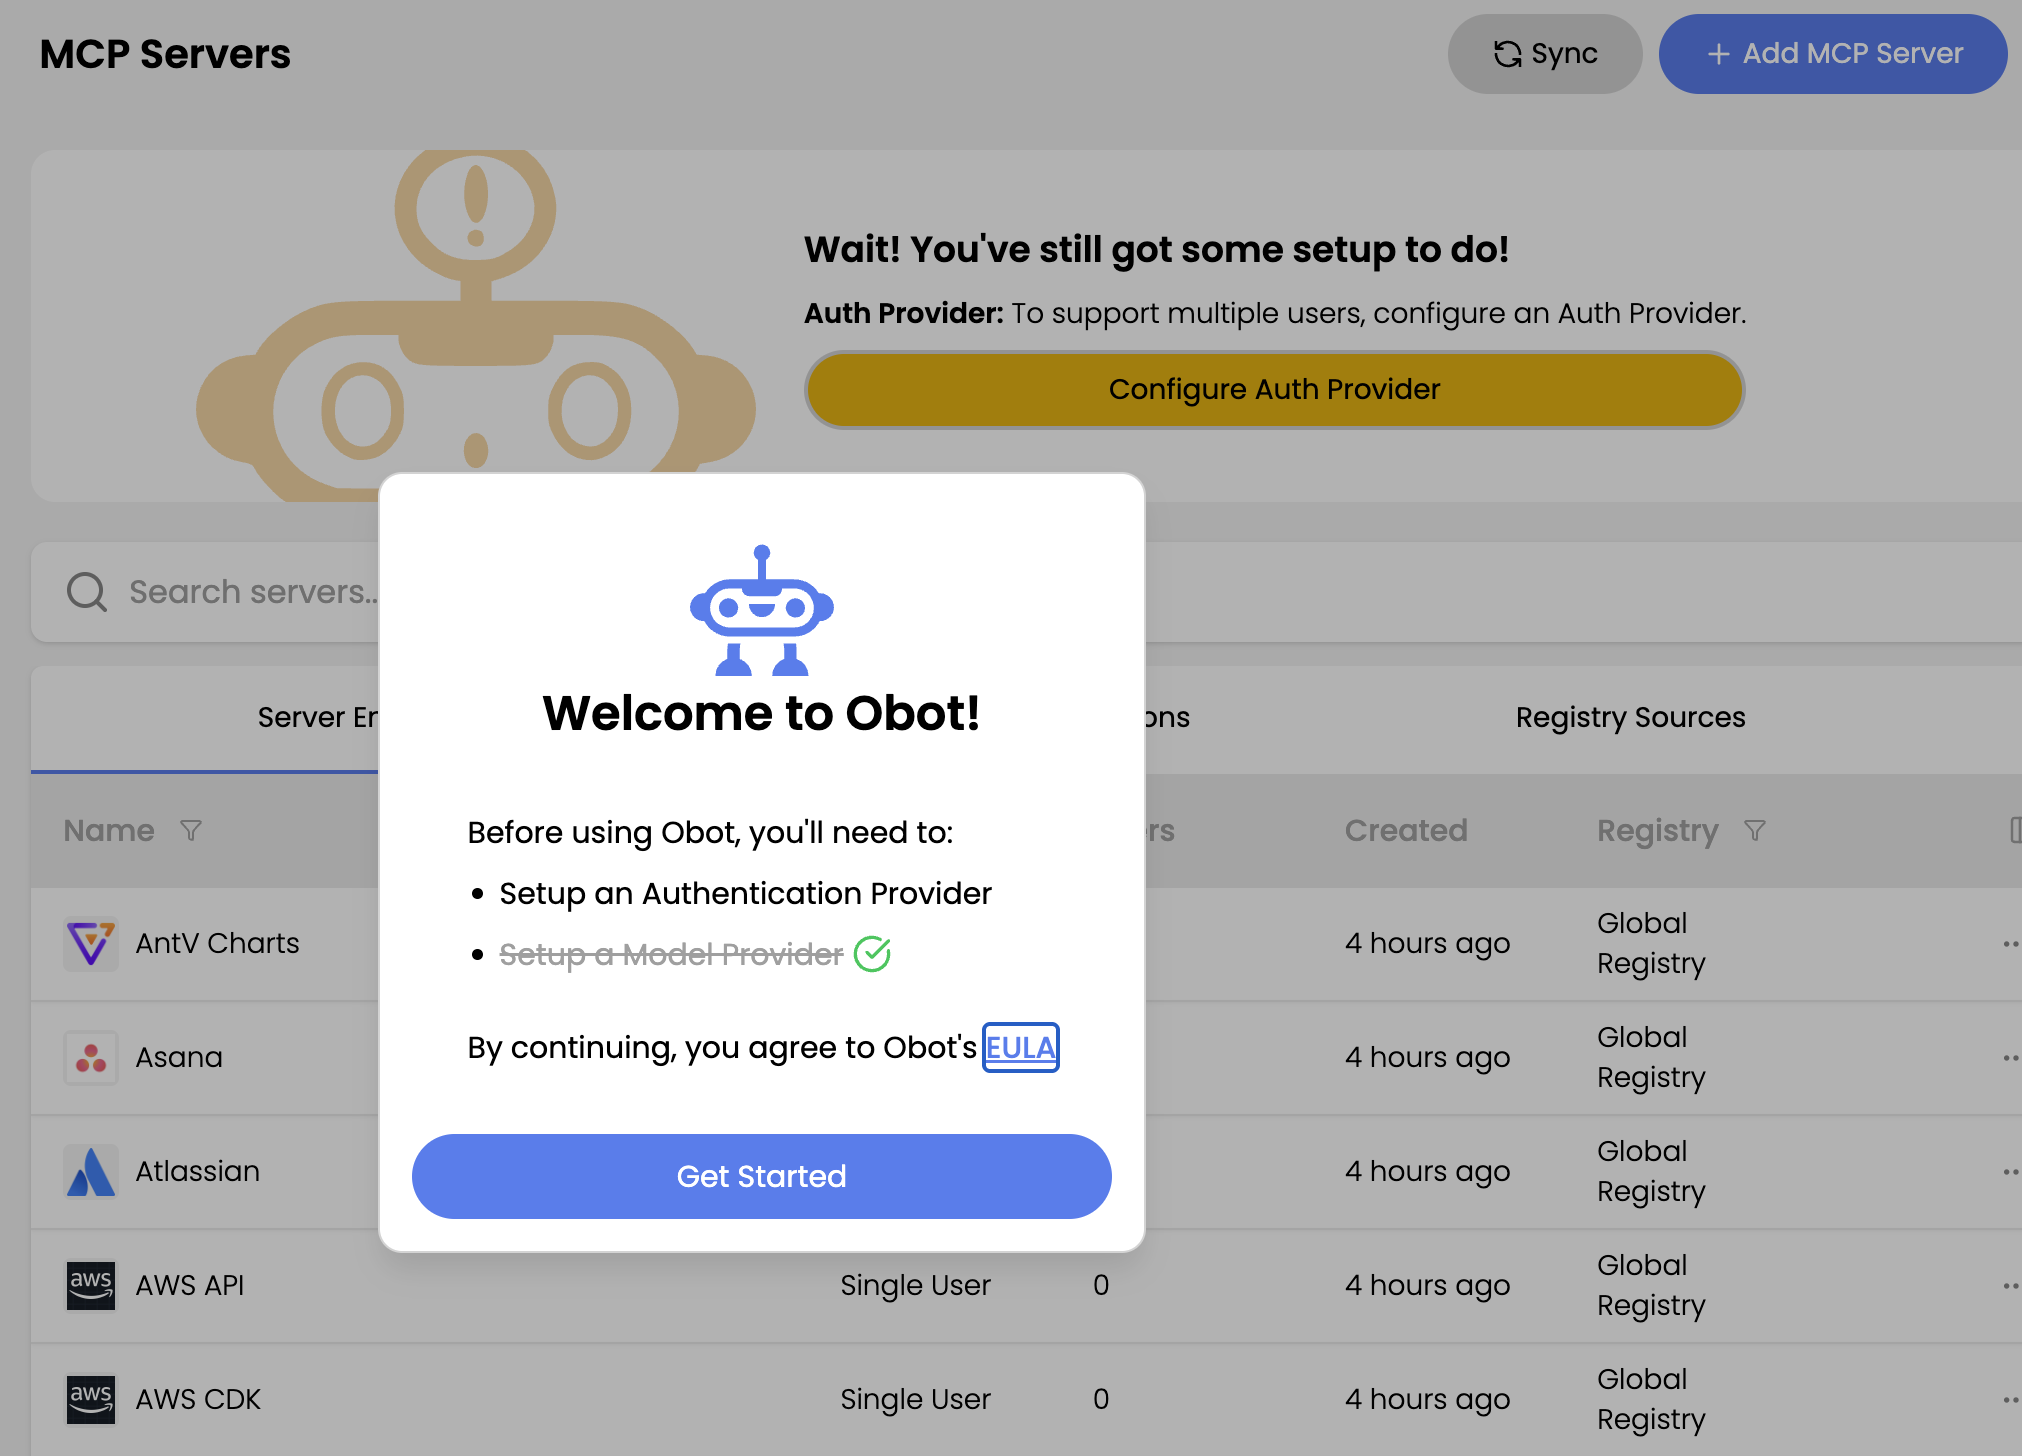
Step 3: Configure Microsoft Entra as the New Auth Provider
- On the Welcome to Obot! page, click Get Started.
- You are redirected to the Auth Providers page.
- Locate Microsoft Entra and click Configure.
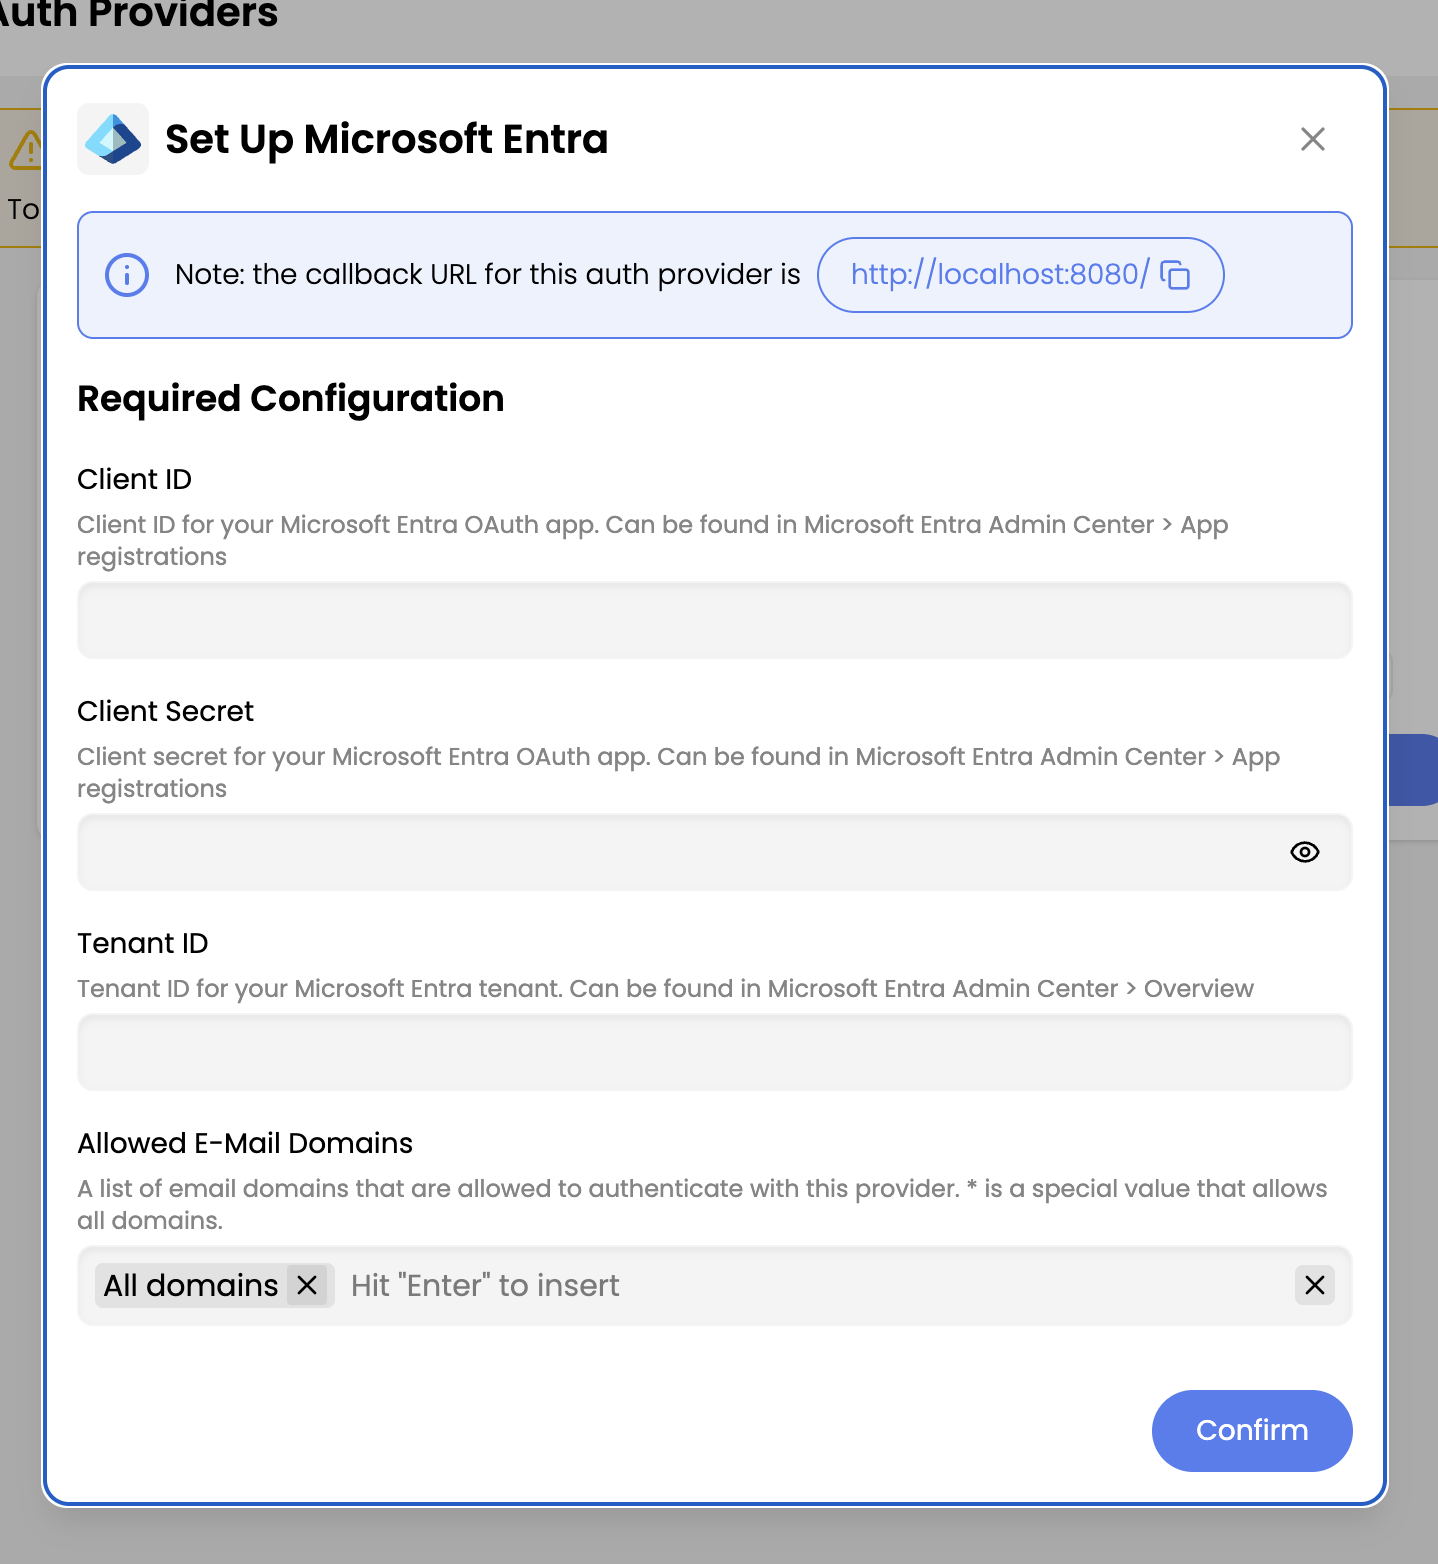
- Follow the documentation to create and configure the Entra application from Entra Instructions.
- Enter the required details:
- Client ID
- Client Secret
- Tenant ID
- Click Confirm.
- Log out.
Step 4: Log In Using Microsoft Entra
- Log in to the Obot server (
<obot-server>). - Authenticate using your Microsoft Entra credentials.
- After successful authentication, a user with the default role is created.
- Log out.
Step 5: Promote the Entra User to Owner
- Log in to the admin console (
<obot-server>/admin). - Click Sign in with Bootstrap Token.

- Authenticate using the Bootstrap token.
- Navigate to User Management → Users.
- Locate the Entra user account created in the previous step.
- Click Update Role and change the role to Owner.
- Log out.
Step 6: Final Verification
- Log in to the Obot server (
<obot-server>). - Click Continue with Microsoft Entra.
- Sign in using the Entra user account that was promoted to Owner in Step 5.
- You should now be logged in successfully as an Owner.
User identities are scoped to the authentication provider used during login. If a user previously authenticated using GitHub later signs in using Entra with the same email address, Obot creates a new user record. As a result, multiple user accounts with the same email address may exist when authentication providers are switched.